Back to CrisisManager Main Menu
Sub-Organizations
In CrisisManager, sub-organizations allow you to group your schools into specific sections, so that you can assign the appropriate Administrators to them. After assigning Administrators to a sub-org, they can then view and manage the plan(s) within it, without being able to see other plans at the top level organization.
How to Add a Sub-Organization
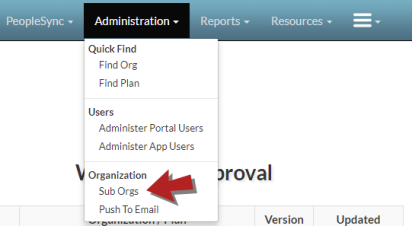
- Click on the Administration tab, and then click on Sub Orgs.

- On the Main Sub-Organizations page, click the Add-Sub Organization button.
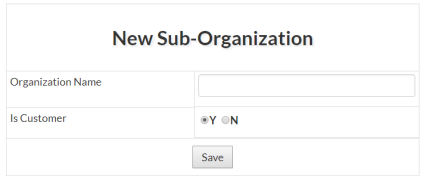
- Enter the Organization Name in the field, and then click Save to add the sub org to CrisisManager.
Adding an Administrator to a Sub-Organization
Once you create a sub-organization, you can easily add Administrators to it. By doing so, the Administrator will only see plans for their sub-organization. They will also only have the ability to edit existing plans or create new plans at their sub-org level, and will not see plans at the top level organization. *Note: Once an Administrator as been added to a sub-organization, you will not be able to move them to another organization.
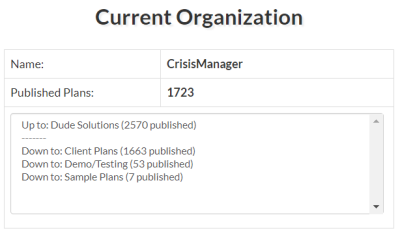
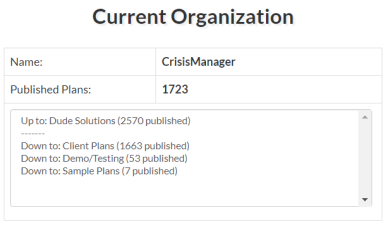
- In the Current Organization section of your home page, click on the name of your sub-organization to be taken to its main page.
-
At the top of your sub-organizations home screen, click on the Administration tab, and then click on Administer Portal Users.
-
Click Add User at the bottom of the Portal Users list.
-
Fill in the red required fields with the user's name, email address, physical address, and phone number.
-
Click Add This User to save.
-
Once you have added the user, you can then set their permissions within the system:
-
Administer Users - allows this user to add other portal users to the system.
-
Administer Crisis Plans - allows this user to edit, delete, and publish plans to mobile devices.
-
Administer Contacts - allows this user to upload, edit, add, and delete contacts in the system.
-
Copy Plans - allows this user to copy a plan from any organization that is viewable by the user.
-
Create Plans - allows this user to create plans from an existing template.
-
View Plans - allows this user to see plans without the ability to change or make edits to them.
-
View Incident Reports - allows this user to view, run queries on, and export any reports of incidents or occurrences submitted by your end users.
-
Send Push Messages - allows this user to send push notifications from CrisisManager to your end users' mobile devices.
-
Choose Organization - refers to any organization that may be a larger umbrella organization with subsequent organizations beneath it. A user with this permission will be able to choose which group of plans to work in.
-
Manage Sub Orgs - allows this user to add, rename, and delete sub-organizations.
- Data Administrator - allows the user to upload and audit User Group Import Service data. Any user with this permission will also need the Administer Crisis Plan permission to be able to associate a UGIS list to a Plan.
-
-
Once you are finished setting the permissions for the user, click Update Information to save. The user will then receive an email to confirm their access to the Administrative Online Portal and will then be able to create their login information.
Copying a Plan to a Sub-Organization
After you have created a sub-organization, you can then copy plans that are listed in your top level organization, down into that sub-org.
- In the Current Organization section of your home page, click on the name of your sub-organization to be taken to its main page.
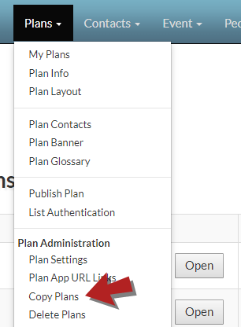
- Click on the Plans tab, and then click on Copy Plans.
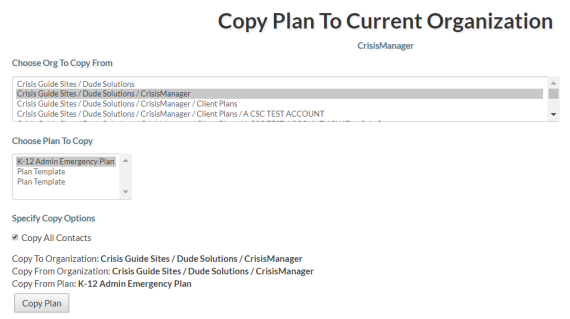
- On the Copy Plan To Current Organization page, be sure to select the top level organization from the Choose Org To Copy From section. When you do this, all plans for that organization will display in the Choose Plan To Copy box.
- Select the plan you would like to copy in the Choose Plan to Copy box.
- Check the box next to Copy All Contacts to carry over any contacts that were added to the plan you are copying.
- Click the Copy Plan button.